Showing posts with label Food. Show all posts

Monday, 5 February 2018

Cloudy February

Another month has drifted by. There have been some upsets here and there, but I like to think that I'm getting better at handling them. I'm still working hard to improve myself. It's a hard battle, and I'm my own enemy. But I am seeing progress, and I won't stop now.

Unfortunately, I'm starting to see diminishing returns with my touch-typing. I think there's only so good I can get while working with a laptop keyboard. I really would like to own a Model M keyboard. There's probably one in the storeroom somewhere, but I doubt it works, and the connector probably wouldn't fit my computer. One of the old computers in the lab had a Model M. It was rather dirty, as was normal for shared equipment that no-one was responsible for cleaning, but the keys were well-spaced, and made nice clicking sounds. I once spilled tomato soup on it by accident. The keyboard survived, but the Esc key was always a bit odd after that.

Recently, I managed to reach IKEA just in time to try out their breakfast dishes. The waffles were somewhat hard, dry, and underwhelming – probably because I got to them late – but the scrambled eggs and hashbrowns were genuinely good. It's definitely worth the extremely low price. I'm not a huge salmon fan, but their salmon croissant is pretty good too. 

I've reached the age where ghost stories don't scare me very much, but stories of home invaders and creepers are frightening. Is it a sign of being an adult, to fear hypothetical creatures less than other people? People are terrifying, and there are some exceptionally terrifying people in this world.

This entry was rather stream-of-consciousness, wasn't it? I do have some more things going on, and a frozen cheesecake recipe to post, but I think I'll stop here for now.

Wednesday, 3 January 2018

Recipe: Breaded Chinese Rolls

Another recipe from my childhood! These are the slightly more filling counterpart to the fish cutlets.

Breaded Chinese Rolls
Makes 20–25 rolls

Ingredients
2–3 (400–600 g) large potatoes
400 g can tuna or mackerel in water
1 tbsp rice vinegar
1–2 tsp salt, to taste
1 tsp ground black pepper
1–3 tsp red chilli powder, to taste
1–2 tbsp canola oil
2 green chillies, chopped
8–10 cloves garlic, finely minced
1" ginger, finely minced
2 Bombay (red) onions, finely chopped
2 tsp soy sauce
1 tbsp tomato ketchup or paste (optional)
50× 7.5" package frozen spring roll wrappers, thawed
2 eggs, lightly beaten
200 g panko breadcrumbs or crushed cornflakes
4–8 tbsp (30–60 ml) soybean, peanut, or canola oil

Pierce potatoes all over with a fork, and boil them in their skins until fork-tender, about 30 min. Allow to cool slightly. Peel, mash, and set aside.

Drain tuna, and flake with a fork. Season with vinegar, salt, pepper, and chilli powder. Mix in chilli, garlic, and ginger.

Heat pan over medium heat, and add 1 tbsp canola oil. Once oil is shimmering, add tuna mixture. Fry, stirring often, until most of the water has dried up, and the tuna is fluffy (30–60 min). Add onions, and stir-fry until soft. Season with soya sauce, and tomato ketchup or paste.

Mix in mashed potatoes in batches. Continue frying the mixture until dense and very difficult to stir. Allow to cool.

Lay out two spring roll wrappers, one on top of the other, onto a flat plate or cutting board. Place 1–2 tbsp tuna filling close to one end of the stacked wrappers, centred. Shape the filling into a small log, about 2" long. Fold the ends of the wrappers together over the filling, followed by the two sides. Roll up tightly, and press down the seam. Repeat for the remaining filling and wrappers.

Dip the rolls in beaten egg, followed by the breadcrumbs. If desired, dip the breaded rolls in a second layer of egg, and bread a second time. Breaded rolls can be fried immediately, or stored in the freezer. For frozen rolls, thaw 30 min in the refrigerator before frying.

Deep-frying: Deep-fry rolls in preheated oil for 2–3 min each.

Oven-frying: Line a large dark pan with aluminium foil. Pour soybean, peanut, or canola oil inside; swirl to coat the bottom and sides. Place pan in the top rack of the oven, and preheat to either 200°C (canola oil), or 220 °C (soybean or peanut oil). Once oil has heated up, remove pan from the oven. Carefully place rolls into the pan, roll once in the heated oil, and space out evenly. Bake 15 minutes. Retrieve pan, overturn each roll, and bake another 12–15 min until golden-brown.

Wednesday, 15 March 2017

Pineapple Tarts

It's already the Ides of March! Where is the year going.

I love pineapple tarts (the "golden pillow" variety), but they are both seasonal and really quite expensive. Making my own sounded like a great idea!

Pineapple Tarts (makes 30-45)
Adapted from this recipe. 

Filling
565 g (340 g drained) can of pineapple chunks
100 g granulated sugar, plus extra
1 1/2 – 2 tsp fresh lemon juice
1 – 1 1/2 tsp tapioca starch

Tart pastry
300 g all-purpose flour
75 g cake flour
50 g icing sugar
2 tbsp corn or tapioca starch
1/4 tsp table salt
220 g Golden Churn unsalted butter, at room temperature
1 tsp vanilla essence
3 egg yolks, divided
1 tsp water

To prepare the filling, drain pineapple. Place in a blender and pulse briefly until crushed. In a non-reactive saucepan, combine pineapple and sugar. Cook over medium-low heat, stirring constantly, until most of the liquid has evaporated. Stir in lemon juice, and extra sugar to taste. Add tapioca starch to thicken to desired consistency. Cool to room temperature before use.

To prepare pastry, whisk flours, icing sugar, cornstarch, and salt. Set aside. Cream butter using an electric mixer until light and fluffy. Fold in vanilla essence using a spatula. Add two egg yolks and beat until combined.

Using a whisk, slowly beat in half of the flour mixture. Add remaining flour and beat with a wooden spoon until just combined. Scrape pastry dough together and knead 1–2 times to form a ball.

Divide dough into 30–35 balls (about 20 g each). To make each tart, press down on each dough ball to form an indentation. Place 1/2 – 1 tsp pineapple filling into the indentation and pinch shut. Roll lightly between the palms to form a pillow shape. If desired, decorate with a fork.

Preheat oven to 180°C. Whisk remaining egg yolk with water. Place pineapple tarts on a parchment-lined baking tray and brush with egg yolk glaze. Bake 15–20 minutes until golden-brown.

Notes

Theoretically, cornstarch can be used to thicken the filling, but I don't like to use it in fruit fillings because it tends to dull the flavour. Besides tapioca starch, potato starch also works well.

Golden Churn butter is magic and doesn't turn into oil at Singapore room temperatures. I strongly recommend this brand for this particular recipe.

The cake flour helps with the "shortness" of the dough, it can be replaced with plain flour mixed with 1–2 tbsp rice flour. Gluten-free flour would probably work, too.

I haven't tried this yet, but I think a touch of almond essence would help with the flavour. Perhaps 1/2 tsp vanilla essence, and 1/2 tsp almond essence. Other things I'd like to try: different glazes (the egg yolk glaze is very eggy), using silken tofu instead of egg yolks in the pastry, adding cheese powder to the pastry.


Thursday, 16 February 2017

Lemon Curd (Egg-Free)

I could have sworn that I had posted this long ago... Anyway, here is some egg-free lemon curd that, with further substitution, can be made vegan.

Lemon Curd (Egg Free)
Loosely adapted from this orange curd recipe.

Ingredients
180 - 250 ml juice from 2 lemons
Zest from 1 lemon
30 ml aquafaba
50 g silken tofu
150 g granulated sugar
1/4 - 1/2 tsp gelatin
4 tbsp unsalted butter
Pinch salt

Over medium-high heat, simmer lemon juice until reduced to about 60 ml. Stir in zest; set aside.

Blend aquafaba and tofu until smooth. Whisk in sugar until incorporated. Stir in cooled lemon juice and gelatin.

Return to medium heat. Whisk constantly until curd has thickened to a pudding-like consistency (about 10 minutes).

Strain curd, if desired. While still warm, stir in butter and salt. Transfer to a clean, airtight jar and keep refrigerated.

Notes

Add more or less gelatin to adjust the firmness of the curd. For the above recipe, 1/4 tsp gelatin makes a spreadable curd but not too sloppy curd, while 1/2 tsp is a little closer to jelly.

Adjust the amount of sugar to taste (I only use 100 g, because I like a more tangy curd).

Friday, 10 February 2017

KFC Chizza

So I tried KFC's newest offering. The Chizza is a cross between fried chicken and Hawaiian pizza. Or, if you prefer, chicken parmigiana with pineapple.


It's not terribly big; the box is about 15 by 15 cm.


Compared with other pictures I've seen, mine looks pretty attractive! It's at least vaguely heart-shaped.


And here is a cross-section. The Chizza is composed of a battered chicken fillet - original recipe, judging by the taste - topped with tomato sauce, chicken ham, pineapple chunks, a proprietary cheese sauce, and mozzarella cheese. Did I mention that it's basically chicken parmigiana?

In spite of its dubious appearance, the Chizza is actually pretty good. The chicken is standard KFC fare, juicy with a crisp crust. The tomato sauce is unexpectedly excellent, a good balance of tangy and sweet. The cheeses, ham, and pineapple come together nicely without overwhelming the taste of the chicken base. Since it doesn't contain much in the way of carbohydrates, it's not too heavy, and it's not terribly greasy either.

I do recommend using a fork and knife, because it is pretty messy and difficult to hold. Also, at S$5.10 à la carte, it is on the expensive side. Nevertheless, it's worth trying at least once. I might go get another one, when the hype dies down a bit. (When I was at KFC, practically everyone was ordering a Chizza. Or multiple Chizzas. The staff really had to rush around. It was crazy!)

Friday, 20 January 2017

Chocolate-on-Chocolate Tart with Spiced Oranges

This genuinely fantastic recipe seems to have disappeared off the internet, so I'm reposting it here. The recipe was originally published in a 2012 or 2013 issue of the Coles Magazine. The text is the intellectual property of Coles Supermarkets Australia, I'm simply circulating the tapes.

Chocolate-on-Chocolate Tart with Spiced Oranges

Ingredients

1 1/2 cups plain flour
1/2 cup caster sugar
1/4 cup cocoa
120 g butter, chopped
1 egg, lightly beaten
Cocoa, for dusting
1-2 tbsp chilled water

Chocolate filling
300 g dark chocolate, chopped
300 ml cream
2 eggs, lightly beaten

Spiced oranges
6 oranges
1/4 caster sugar
1 star anise
4 Coles brand cloves
1 cinnamon stick

To make pastry, place the flour, caster sugar, cocoa and butter in a food processor. Process until mixture resembles coarse breadcrumbs. Add the egg and chilled water and pulse to form a dough. Turn onto a lightly floured surface and bring dough together to form a disc. Wrap the dough in plastic wrap and refrigerate for 30 mins.

Roll dough until 5 mm thick. Ease into a 24 cm fluted, loose-based, non-stick flan tin. Trim edges. Refrigerate for 20 mins.

Preheat oven to 180ºC or 160ºC fan. Line pastry with baking paper and fill with pastry weights, dried beans or rice. Blind-bake for 15 mins. Remove paper and weights and bake for another 10 mins, until firm.

Meanwhile, to make chocolate filling, place the chocolate in a heatproof bowl. Heat cream in a small pan until just at simmering point. Pour over chocolate and set aside for 5 mins. Stir until melted and smooth. Cool slightly. Add eggs and stir to combine.

Reduce oven temperature to 130ºC or 110ºC fan. Pour chocolate mixture into prepared tart shell and bake for 30 mins, until filling is set but still wobbly. Refrigerate until cold.

Meanwhile, to make spiced oranges, remove zest from 1 orange and set aside. Peel all six oranges, removing pith. Using a small knife, segment each orange over a bowl, to catch juice. Strain the juice into a small saucepan, setting aside orange segments in bowl. Add 1/4 cup of water to juice in saucepan, along with sugar, star anise, cloves and cinnamon stick. Simmer for 5 mins, until syrupy. Pour syrup over orange segments and top with zest.

Dust tart with cocoa and cut into wedges. Serve with spiced oranges and a drizzle of syrup.

************

And now... here is my modified version.

Ingredients

Pastry 

120 g plain flour
70 g cake flour
15 g (1/4 cup) cocoa, plus extra for dusting
70 g caster sugar
120 g salted butter, chopped and kept chilled
1 egg, lightly beaten or 3 tbsp aquafaba, chilled
1-2 tbsp water, chilled

Chocolate filling 
300 g good quality dark chocolate
1/4 tsp instant coffee (optional)
300 g whipping cream
2 eggs, lightly beaten

Spiced oranges 
3-6 whole oranges
35 g caster sugar
60 ml (4 tbsp) water
1-2 star anise fruits
4 cloves
1/2 cinnamon stick (or about 1/2 tbsp fragments)

In a medium bowl, whisk together the plain flour, cake flour, cocoa, and sugar. Chill in refrigerator for 5 min. Toss butter in flour mixture, then rub with fingertips until the mixture resembles coarse breadcrumbs. Add more flour if necessary. Mix in beaten egg. Add chilled water as necessary until the dough just comes together. Turn onto a lightly floured surface and shape into a disc. Wrap on cling film and refrigerate for at least 30 min.

Lightly grease a 24 cm (9.5") fluted flan tin. Place dough disc between two sheets of piece of parchment paper or aluminium foil, and roll to 5 mm thickness. Remove the sheets and ease pastry dough into the tin. Press dough into the tin, smoothing out any air bubbles, and trim the edges with a sharp knife. Line with aluminium foil and refrigerate for at least 2 h.

Preheat oven to 180°C. Remove tin from refrigerator and fill with pastry weights or beans. Blind-bake for 15 min. Remove foil and weights; bake another 10 min until firm.

Meanwhile, prepare the chocolate filling. Place chocolate in a large heatproof bowl or saucepan, and sprinkle with instant coffee if using. Over a double-boiler or in a microwave, gently heat cream until just simmering. Pour over chocolate and stir until smooth. Allow to cool for 5 min. Add 1 tbsp of chocolate mixture to beaten eggs and mix well. Stir tempered egg mixture into the chocolate until combined.

Reduce oven temperature to 150°C. Pour chocolate mixture into tart shell and smooth the top. Cover with foil and bake 25 min until filling is partially set. Remove foil and leave uncovered in the warm oven for 10 min. Remove tart from oven and cool to room temperature on a wire rack. Refrigerate until completely chilled.

To prepare spiced oranges, reserve zest from 1 orange. Peel and segment all the oranges, reserving the juice. In a small saucepan, combine the juice, water, sugar, spices, and zest. Bring to a simmer; simmer 5 min until syrup has thickened. Strain syrup and drizzle over orange segments.

Dust chilled tart with cocoa. Cut into wedges and serve with spiced oranges.

Notes

The tart pastry can also be prepared using 190 g gluten-free flour for an extra-crumbly crust.

Saturday, 7 January 2017

Recipe: Strawberry Melba Sauce

My first post of this year is about dessert. Of course.

Melba Sauce is one of those completely delicious things that seems to disappear off store shelves after you have become hopelessly addicted to it. Unfortunately, with fresh raspberries being as expensive as they are in this country (or simply unavailable), preparing the authentic version of this sauce is from scratch difficult.

Below is a workaround version I created that fairly approximates the taste of the bottled sauce. At any rate, it goes well with ice-cream, toast, and cake.

(The photograph below features two squares of zesty magic custard cake.)


Strawberry Melba Sauce
Makes about 1 cup

Ingredients
250 g fresh strawberries, roughly diced
50 g dried currants
1/2 cup (125 ml) raspberry conserve
1/4 cup (4 tbsp) caster sugar
3-4 strips thinly-peeled lemon rind (no pith)
Pinch salt
1 tbsp fresh lemon juice

Add just enough water to the currants to cover them, and soak for at least 10 minutes. In a small, non-reactive bowl, mix sugar and lemon rind. Stand for 10-15 minutes.

In a small saucepan, mix strawberries, raspberry conserve, and soaked currants (including all liquid). Place on the stove over low heat and bring to a simmer. Simmer, covered, for about 20 minutes until the fruit breaks down. Stir in the pinch salt and the lemon rind mixture until all the sugar has dissolved; remove from heat. Stand for 5 minutes.

Strain sauce into a heatproof bowl using a fine-mesh strainer or cheesecloth, pressing down with a wooden spoon to ensure that all the liquid passes through. Transfer the strained sauce to a clean saucepan and simmer further until thickened, if desired. Alternatively, microwave on low heat for 1 minute at a time, stirring in between.

Allow sauce to cool slightly, then stir in lemon juice. Transfer to a sterile, airtight jar. The sauce can be stored in the refrigerator for about 3 weeks.


Saturday, 31 December 2016

2016: A Killer Year

Look back upon the glory days of 2012, when I used to post more than a dozen times per year. This hasn't quite been a good year! People have died, the world has had some moments of insanity, my chilli plants refuse to produce fruit... It's been...some year.

On the other hand, some things have gotten better, at least for me. I've gotten a handle on my chronic procrastination – on that note, I strongly recommend watching Dr. Tim Pychyl's lecture on the subject, his research drills down into the psychology of procrastination, and so his advice has a sound scientific backing. I've commented on my weight loss before, but it's probably worth noting that I've managed to maintain a healthy weight for the past five months or so. After years of being iron deficient, my iron levels are back up, too, thanks to daily consumption of black sesame soup and dark chocolate. Quite dramatically, my hair stopped falling out as much. It's funny, what you get used to when you're chronically unhealthy.

McDonald's has brought back the Gula Melaka McFlurry for Chinese New Year. Someone out there is listening!

A friend got married in December, so I attended my first-ever Chinese wedding. You can believe I spend hours reading up on gift-giving and attire-related customs before going! They weren't terribly strict about it, but I think a wedding is the worst possible place for a social gaffe. I probably didn't have to check all the banknotes (it is traditional to gift money) to ensure that the serial numbers didn't contain 4 or 13... The wedding did introduce me to Cantonese cuisine. Crispy-skin chicken looks like an interesting challenge!

I just want to say, I once tried making soufflé when I was quite young, and it failed so miserably that I didn't try again for years. Then I watched the QI episode featuring Carrie Fisher, in which she declared that soufflé is really quite easy to make, and she did not see what the fuss was about. Inspired, I tried making soufflé again.... and it worked. Perfectly. 

I was devastated when I heard Ms. Fisher had passed away. There have been many notable deaths in 2016, but this one cut deep. She was a remarkable woman, and it's no wonder that so many admired and respected her. Rest in peace, Ms. Fisher.

This was a downer of a year, wasn't it. But tomorrow is another year.

Monday, 8 August 2016

Recipe: Gula Melaka Ice Cream Dessert with Kueh Lapis Chunks

Recently, in honour of the upcoming 51st National Day (tomorrow), McDonald's released the Gula Melaka McFlurry in Singapore. I had one, one overcast Saturday afternoon. Light vanilla soft-serve ice cream, very delicately flavoured with gula melaka syrup, complemented by the startling crunch of kueh lapis croutons, it was possibly the most perfect ice cream dessert I had ever tasted, certainly the one of the best desserts to ever come out of a fast food restaurant. 

But by the next week, it was gone, replaced by the vastly inferior Dinosaur McFlurry. My mother, even more fond of all things gula melaka than I am, was positively heartbroken. She hadn't managed to try it even once.

Until our local McDonald's decides to bring back ice cream perfection, I created the following DIY version. It is not nearly as fluffy as a McFlurry—apparently, soft-serve ice cream is really difficult to make without expensive equipment—and the low-calorie ingredients do affect the creaminess (more on that in the Notes section below). Alternatively, use store-bought vanilla ice-cream, or bring along a cup and the appropriate toppings to IKEA, and take advantage of their $0.50 soft-serve cones. Almost anything can be achieved with determination!


Gula Melaka Ice Cream Dessert with Kueh Lapis Chunks

Vanilla ice cream (makes about 650 ml)

150 g raw cashew nuts
125–150 ml water
1/4 tsp salt
285 ml milk
75 g caster sugar
50 g silken tofu
1 tsp vanilla extract

Rinse cashews well. Cover with water and let stand at room temperature for 3 hours. Drain well, and transfer to a blender or wet grinder. Stir in salt and 125 ml water. Blend at high speed, scraping down sides as required, until smooth. Blend in a little more water, adjusting the consistency to resemble that of thick dairy cream. Once adjusted, the cashew cream should weigh about 290–300 g.

Set up a large heatproof bowl over a pot of simmering water to use as a double-boiler. Whisk together cashew cream, milk, and 30 g caster sugar. Stir gently over heat until almost boiling, when small bubbles appear at the edges of the bowl and steam starts rising from the top. Remove from heat.

Whisk together the tofu and the remaining caster sugar until smooth and thickened. Whisk in 125 ml of the warm milk mixture. 

Reheat the milk mixture until almost boiling again. Whisk in the tofu mixture until well-combined. Simmer for about 10 minutes over low heat. The ice cream base should be thick enough to coat the back of a spoon.

Set the bowl over a dish filled with ice. Stir in vanilla extract. Cover with a piece of cling wrap pressed against the surface of the fluid, to prevent a film from forming. Stand for 20 minutes. 

Refrigerate the ice cream base for at least 3 hours to overnight, until well-chilled. Churn using an ice-cream maker, or by hand by placing the ice cream in the freezer and whisking it every 45 minutes as it solidifies. Soften the ice cream in the refrigerator for 15–20 minutes before scooping.


Kueh lapis croutons (makes about 80–100 cake croutons)

75 g butter, softened but still chilled
30 g condensed milk
3/4 tsp rum, or 1/4 tsp rum essence
20 g all-purpose flour
1 tsp cornstarch
1/16 tsp (generous pinch) rempah kueh or allspice
50 g silken tofu
30 g caster sugar
45 ml aquafaba
1/16 tsp cream of tartar

Preheat oven to 200°C. Very lightly grease an 8-inch square baking tin using a paper towel. Line with parchment paper; grease the paper, and dust lightly with flour. 

Place butter, condensed milk and rum in a medium mixing bowl. Cream using an electric mixer until fluffy, about 5 minutes. Place in refrigerator while not in use.

Sift flour and cornstarch together 5 times. Whisk in spice. Gently fold into butter mixture.

Whisk tofu and 15 g caster sugar at high speed until thick and smooth. Gradually fold into butter mixture.

Clean mixer blades well, and chill them briefly in the freezer. Prepare a chilled mixing bowl, preferably stainless steel, and place over a plate or bowl filled with ice. Place aquafaba in bowl, and sprinkle cream of tartar on top. Using chilled mixer blades, whip at low speed until foamy. Slowly pour in remaining 15 g caster sugar along the side of the bowl, and continue whipping until stiff, glossy peaks form, and the bowl can be overturned without the contents falling out. 

Gently fold 1/3 of whipped aquafaba into the batter. Carefully fold in the remaining aquafaba, leaving some unmixed streaks. Refrigerate while not in use.

Preheat prepared baking tin until butter starts to sizzle. Transfer 1/3 of batter (about 90 g) and spread evenly around the base of the baking tin. Bake 5–10 minutes until golden-brown. Remove from oven.

Increase the oven temperature to 220°C; place an oven-proof tray filled with water at the base of the oven (alternatively, switch the oven to use only the top heating element). Add another layer of batter to the baking tin and spread evenly; give it a sharp rap against the table before placing it in the oven. Bake for 5–10 minutes until golden-brown.

Retrieve the tin from the oven. Press down gently using a buttered kueh lapis press or the back of a spoon. Add the final layer of batter. As before, spread batter evenly, and rap the tin against the table before transferring to the oven. Bake another 3–5 minutes until light golden, but not as fully-browned as the previous two layers. 

Allow the cake to cool in the tin for 5–10 minutes, until it can be handled but is still warm. Use a serrated knife to cut the cake into four even squares, and carefully stack them up on top of each other. Cover the topmost layer with a greased piece of parchment paper, and place a broad-based weight on top (I used an airtight lunchbox filled with water, with a ceramic teapot placed on top). Allow to sit for 30–60 minutes until compressed.

Using a serrated knife, cut the cake into 1.0–1.5 cm cubes. Carefully transfer cake cubes to a lined and greased baking tray, spacing them out. Bake at 180°C for 15–20 minutes or longer, to desired crispness. For longer baking times, cover loosely with a piece of aluminium foil to prevent charring.


Dessert assembly

Scoop ice cream into a chilled glass or ramekin. Scatter a few kueh lapis croutons on top and drizzle with gula melaka syrup.


Notes

What's with all the bizarre ingredients? Well, I am calorie and cholesterol-conscious these days. For less healthy but creamier alternatives, substitute as follows:

45 ml aquafaba: 45 ml egg whites, from 1–2 eggs
300 g cashew cream: 300 ml heavy cream (at least 45% milk fat)
50 g silken tofu: 50 g egg yolks, about 3

Going in the opposite direction, it probably is possible to make a fully-vegan version of this recipe, by replacing the butter, milk, and perhaps sugar as well (if bone char refining is a problem). I... haven't tried.

For the kueh lapis, the all-purpose flour and cornstarch can be replaced by 22.5 g cake flour. If using cake flour, it only needs to be sifted once.

I use Sing Long Gula Malacca syrup, but the syrup can be prepared from scratch using palm sugar.

References


Sunday, 31 July 2016

Giant List of Recipes

I prepare my own breakfast daily, lunch for six days of the week, and dinner on one day (all other meals belong to my mother - and yes, belong is indeed the correct term). I also make desserts from time to time. And since I'm a food addict and I love trying new things, I go through a lot of recipes. Occasionally I will write them up here, generally if I've made more than a few modifications to the original recipe or combined a few together. Mostly though, I just use them as-is.

Anyway, here is a list of recommended recipes that I have tried relatively recently.


Soups:
Miso ramen with crispy pork [I used beef instead of pork and omitted the burnt garlic-sesame oil]

Breads and side dishes:
All-green spring slaw [I used butterhead lettuce instead of cabbage, Chinese celery instead of Pascal celery, and replaced the dressing entirely with 150 g Greek yoghurt, 2 teaspoons Dijon mustard, and 2 finely-minced garlic cloves whisked together]
Pink grapefruit and watercress salad [I left out the endive and sumac]


...I could have sworn there were more. Actually, there were more, but they may not have been very good. Many of the good ones seem to be from Serious Eats, which is a generally great site for picking up cooking skills.

Wednesday, 25 May 2016

I'm a Doctor, Not a... Normal Doctor!

I have my PhD! The graduation represented a final gauntlet - seriously, half an hour before the ceremony they piled on a set of complicated instructions, complete with a map, and pretty much everyone got it at least slightly wrong - but we all survived, no-one tripped on stage or lost their bonnet, and about twenty new doctors stepped out into the world. And then cupcakes were had.


Unrelated topic - since the previous post, I have managed to get my hands on a bottle of kirschwasser! Authentic Black Forest cake is now a possibility. My other recent baking attempts have included two different types of bread - potato rolls and Hokkaido milk bread. Both work with aquafaba substitutions, although for the milk bread I still used a beaten egg for the glaze.

A recent acquisition for my kitchen is this Grilla grill pan from IKEA. The price is affordable but the pan works beautifully, I highly recommend it.

Finally, I think it's someone's birthday or something. I think it's... Iron Man's? Yep, just four days from now, on May 29. Happy birthday to Tony Stark!


Sunday, 1 May 2016

Recipe: Black Forest Ice-Cream Cake

I love Black Forest cake - or at least, the whipped-cream-and-sponge confections carried by local bakeries, because authentic Schwarzwälder Kirschtorte is fairly complicated, calls for a liqueur not readily available here, and scorns the notion of calorie control. My brother is fond of it too, so for his birthday I was determined to come up with a version which would be recognisably Black Forest-like without immediately doubling his risk of heart disease. Aquafaba and this ice-cream cake recipe proceeded to save the day.

Black Forest Ice-Cream Cake
Adapted from this recipe at yuppiechef.com

Cake layer

90 g plain flour
50 g caster sugar
2 tbsp unsweetened cocoa powder
1/2 tsp baking powder
1/16 tsp baking soda
45 ml aquafaba (or 1 egg)
2 tbsp milk
3 tbsp canola oil
3 1/2 tbsp water from canned cherries (see below)
1/2 tbsp cherry liqueur or cherry brandy flavouring
180 g Oreo cookies, roughly crushed

Ice-cream layers

411 g can whole tart cherries in water
3 tsp granulated sugar
200 ml thickened cream (35% fat)
45 ml aquafaba or egg whites, chilled
1/8 tsp cream of tartar
190 g sweetened condensed milk
1/2 tsp vanilla essence
1 tsp lemon zest


Prepare the cake 1 day ahead. Grease a freezer-safe springform or silicon tin and line with baking paper. If using a silicon tin, place on a flat baking tray or flan tin to keep it stable. Preheat oven to 180°C.

Whisk together flour, sugar, cocoa powder, baking powder and baking soda. Make a well in the centre and pour in aquafaba, milk, and canola oil. Place cherry water in a microwave-safe bowl or mug and heat 30-60 seconds on high until boiling; add to cake batter. Whisk together until just combined. Stir in cherry liqueur. Mix in crushed Oreo cookies.

Transfer cake batter to the prepared baking tin and smooth out the top. Bake 30-35 minutes until springy to the touch and cooked through. Cool to room temperature, then transfer the baking tin to the freezer. Chill for 45-60 minutes, until frozen solid.

Meanwhile, drain 125 g cherries (reserve the water); halve and set aside in a medium bowl. Transfer the remaining cherries and water to a freezer-proof container and stir in granulated sugar. Place in freezer, stirring every 2 hours to form a slush. 

Using an electric mixer, beat whipping cream to soft peaks, about 5 minutes. Place in refrigerator and clean mixer blades. Beat aquafaba to soft peaks, about 10 minutes. Sprinkle in cream of tartar and continue beating until stiff and glossy, about 5 minutes. Fold aquafaba into cream. Gradually fold in condensed milk, then vanilla essence and lemon zest. Transfer half of the cream mixture to the reserved 125 g cherries and refrigerate the rest. Carefully stir cherries and cream. 

Retrieve frozen cake base from freezer. Quickly spread the cherry cream on top. Freeze for 2 hours until set. Spread remaining cream mixture on top and freeze for 6 hours to overnight, until completely set.

To serve, remove the cake from the pan and peel away the baking paper. Set it on top of a chilled plate and allow to thaw slightly at room temperature, about 10-15 minutes, until it can be cut with a knife. Serve with cherry slush piled on top or on the side.

Notes:

I used two flavours of Oreo cookies (original and chocolate) in equal parts. The cookies can be crushed using a Ziploc bag and a rolling pin, but I find it easier to quickly pulse them in a food processor.

I used homemade aquafaba from boiled soybeans (a little sweet) and chickpeas. They didn't quite whisk past the soft peak stage and collapsed quickly, but the ice-cream came out fine, if a little dense. If you want aquafaba which reliably whisks to stiff peaks, use the water from canned chickpeas.

Canned cherries may look rather pale and unappealing, so you can stir in a few drops of red food colouring to improve their appearance. Fresh cherries can also be used; reserve any juice released while halving and pitting the cherries, and when making the slush, add enough just water to cover the cherries.

Sunday, 3 April 2016

Recipe: Pineapple Streusel Cake (Egg-Free)

There are many, many reasons I love J. Kenji López-Alt, but introducing me to aquafaba is probably near the top of the list.

Aquafaba is the slightly pungent, somewhat turbid water left over from boiling chickpeas (or theoretically, other legumes, but chickpeas apparently work best). Recently, it was discovered that aquafaba can function as a vegan egg white substitute.

I'm not remotely vegan, alas, but I have been watching my calories, and eggs are as calorie-ridden as they come. Also, raw eggs somewhat disgust me. I think it's a combination of the slimy texture, the bits of reddish material you can sometimes see in them, the off-putting smell, and those annoying shards of shell which get into the bowl and then refuse to come out. Not that I'd turn down an omelette, or a hard-boiled egg, or even a poached egg on a baguette slice - anyway, the prospect of replacing egg whites with a non-eggy substitute is very appealing. Also appealing: painlessly dealing with those annoying recipes which call for, say, 8 egg whites but only 2 egg yolks. WHY??!!

Yeah, I'm kinda irreverent when it comes to cookery.

So I found this recipe from an old Family Circle book and substituted in aquafaba. It worked really well. Nobody suspected a thing.

Also, I cut out a bunch of sugar and added weight measurements and stuff.


Pineapple Streusel Cake
Adapted from a recipe in Fabulous Fast Cakes, Murdoch Books, 1994

275 g self-raising flour
125 g unsalted butter
150 g caster sugar
90 ml aquafaba (or 2 eggs)
450 g can pineapple chunks or crushed pineapple
50 g desiccated coconut
80 g brown sugar


Preheat oven to 180°C. Grease and line a deep 20 cm cake pan.

If using pineapple chunks, crush roughly using a blender, wet grinder or food chopper. Strain the crushed pineapple, reserving 125 ml of the pineapple juice. 

Melt butter and caster sugar over low heat, or in a microwave on medium-low, stirring until
homogeneous. Separately, combine aquafaba and pineapple juice.

Sift flour into a large mixing bowl and make a well in the centre. Pour in the butter and aquafaba mixtures into the well, and stir using a wooden spoon until just combined. Transfer half of the cake batter into the prepared pan and smooth the top using a spatula.

Mix crushed pineapple, desiccated coconut and brown sugar until evenly combined. Spread on top of the cake batter in the pan. Carefully add the remaining cake batter and smooth the top. Bake for 1 hour, until the top is crisp and a knife inserted in the centre of the cake comes out clean. Allow the cake to rest for 10 minutes before turning out of the pan. Serve warm.

Notes

To prepare aquafaba, cover about a cupful of chickpeas with water and allow to soak for about 4-8 hours, until the peas have swelled up. Transfer to a saucepan, topping up the water to just cover the chickpeas, and bring to the boil. Simmer for 45 minutes, until the chickpeas are soft. Remove chickpeas with a slotted spoon and continue simmering the water on low heat, until reduced to half the initial volume. The aquafaba will be more viscous than water, but less viscous than egg white.

Alternatively, just use the water from canned chickpeas directly.

The base of the cake may be very moist, so be careful when turning it out of the pan.

Sunday, 27 March 2016

Excess

Last year, through a combination of stress, stress-eating and a hitherto unsuspected food addiction, I gained 10 kilograms over the space of nine months, catapulting me into the "obese" category. This year, I tried to shed them.

I had tried to address my weight in the past, but it never really stuck. I think it was partially because food consumption was a major coping mechanism for me (see "food addiction" above), and the more out-of-control my physique became, the more ashamed and helpless I felt about it. Also unhelpful were the comments from friends urging me to eat more, suggesting that I eat something highly fattening "just this once", or who told me that I shouldn't call myself overweight. Perhaps they meant well, but they eroded away at my resolve, made it harder to control my diet, made me question if I was doing the right thing.

And then there were the worst, the very worst, the allegedly good, supportive friends who fat-shamed me to my face. Perhaps they thought they were being helpful, that the blunt criticism was expected of a close friend, but all they did was make me feel defensive, inadequate, a failure. 

On reflection, perhaps the sort of attitude I desired from my friends was silence. In my own (accurate) estimation, I was unhealthy. I didn't want it pointed out to me, but I didn't want an excuse not to deal with it, either.

My father - who has long been my rock - gave me the key to pushing my weight down. He suggested that I record my weight daily. Of my own accord, I also started recording what exercises I had done that day. And somehow, somehow that worked. The mere fact that I was accountable - that I would have to admit, even if to no-one but myself, that I skipped exercise or stopped losing weight - gave me control, and the will to reduce my weight. I began to monitor my caloric intake, calculating how much I could have per day, how much was in my food, which put me even more in control. Granted, focusing on calories alone is a bad idea - if one plans on fulfilling ones' caloric requirements solely through consumption of, say, pure unsalted butter, a very unhappy future awaits - but the mere fact that I was paying attention to the contents of my food was significant. I learned which foods were high in calories, which foods were extremely high in calories, which foods appeared healthy but were in fact extremely energy-rich, and which foods would fill me up without a major nutritional contribution. I reduced my sugar intake, and got used to the taste. (I took aspartame only occasionally - I'm not a huge fan of the odd, synthetic flavour.)

I did make sure I had a balanced diet. I had long gotten over my childhood dislike of vegetables, and I could eat a lot of them without going over my caloric restrictions. I rotated between different protein sources each week - chicken, fish, beef, tofu. I had a daily chocolate ration - chocolate is extremely rich in iron, which justified the intake - and I allowed myself dessert, either modified to be low-fat or in small portions. I ate four times a day, at roughly four-hour intervals, but would skip or reduce a meal if a previous one had been heavier than usual. I made sure that my weight-loss was gradual, about 0.5 to 1.0 kg a week.

And, well - it's working. I've lost ten kilograms over the course of three months. I've been exercising every day. My body looks better, and feels better. I used to have food cravings all the time, but now I rarely get them.

And I'm shocked at how much less I'm consuming. How much my grocery bill has gone down, how little I really need in order to survive. There had been so much excess. So, so much excess, and it was making me miserable.

It's not over yet. I wasn't exactly a healthy weight to begin with, last year, so there is still some distance to go. I still have to deal with lack of support from others, from people asking to meet up at fast-food restaurants or otherwise pushing unhealthy food on me. But I'm not helpless anymore. I know what to do, I know how to lose weight, and for the first time in years I'm not ashamed of my own body.

I disapprove of fat-shaming. I was on the receiving end of it, and it had a horrible effect on me. But I think that anyone who suspects they might be unhealthy - not overweight, because it is possible to be weight a lot while being perfectly fit, and BMI can be extremely misleading, but unhealthy - should try and do something about it. It can be difficult to find out what works, since health is such a terribly individual thing, but I think it is worth the effort.

Sunday, 8 November 2015

Culture, Cuisine and the Occult

Aww man, it's already November, where did the year go? Also, apparently I've only posted here five times previously this year, this is a new low.

I watched The Martian in the cinema shortly after it came out. It was a thoroughly brilliant and enjoyable film. I don't think 3D viewing added much (I have yet to view a film where it did), but it was not terribly distracting, either. I am also stupidly proud to have known of Andy Weir before he became famous (I have been a longtime fan of Casey and Andy).

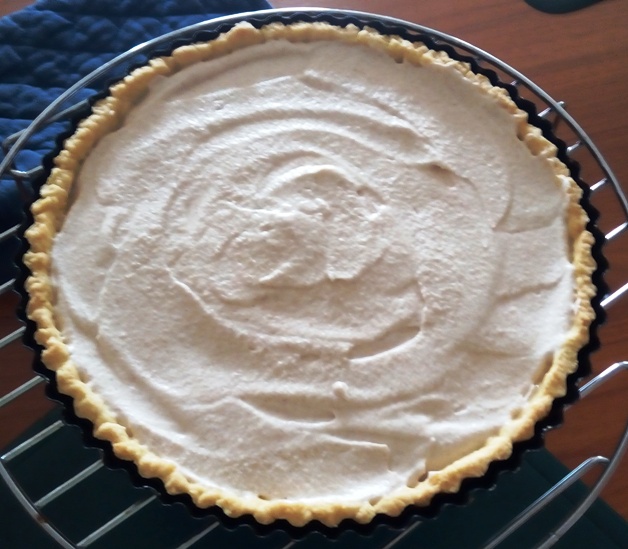
I think its slightly less meaningful to be stupidly proud of any Homestuck alumni, since Homestuck was a force of nature, but I do remember when Toby "Radiation" Fox was relatively nobody. If video games cannot be art, then what is Undertale? For example, without Undertale, this cinnamon butterscotch tart would not have existed.
(Recipe available here - all I changed was to cut the amount of whipped cream topping in half, and use sweet potato flour instead of cornstarch. Also, I suggest allowing the tart to sit in the refrigerator overnight before consuming.)

Contrastingly, spaghetti recipes (for that animate skeleton in your life) are not difficult to find, but this one for Tagliatelle al Ragu Bolognese is my favourite.

Overall, this has been a good year for independent artists. Scott Cawthorn's Five Night's at Freddy's survival horror series, which I have been following vicariously through Let's Plays since I am a huge coward, will be getting a film adaptation from Warner Bros. Pictures. I'm ...not sure if I will overcome my fear long enough to watch the film. Or even the trailer. I enjoy horror prose, as embodied by the SCP Foundation, but visual elements are...harder to ignore.

On the subject of prose, I recently came across the satirical works of Saki, which are freely available via Project Gutenberg. The style rather reminds me of Jane Austen's, but with a mostly masculine viewpoint and greater usage of biting social commentary. Saki's heroes are witty and intelligent, contrasting with their dull, greedy, self-centered antagonists, although over-cleverness is not rewarded either.

My recent readings have included Charles Stross's works. I loved the Laundry Series from about a page into the The Concrete Jungle. The protagonist works for "The Laundry", an organisation very much like the SCP Foundation in function and scope, but with a distinctly British flavour to contrast with the Foundation's faintly North American air. The stories read like detective fiction, in which the protagonist has to figure out what new supernatural creature is involved in the latest case and how to defeat the creature, and any humans who might be assisting it. However, the sheer delight of these stories is how the paranormal is described in terms which allows it to fit into the known scientific world. Equoid is particularly wonderful in this regard. (Note that Equoid is mildly unsafe for work, and very much unsafe for sleep if read immediately prior.) The novella's explanation for the appearance and behaviour of a certain mythical being is fleshed out with gradual, creeping horror, small details inexorably building a final, sickening picture. At the tale's conclusion, I felt both ill and enlightened.

Returning to video games, I think A Very Long Rope to the Top of the Sky is another strong contender for the video-games-can-be-art argument. It's a thoughtful game, deconstructing some video game tropes while playing into some others. It's also, frankly, underrated. Perhaps the long title, somewhat subpar graphics and plodding pace put off some players. It is a long game, and it takes a while for its true brilliance to be apparent, but it is very much worth playing until the end.

This was another edited stream-of-consciousness post. It's almost the only type of post I write. Also, I'm not good at closing paragraphs, possibly for the same reason. My mind certainly doesn't stop, not just yet, so how should this prose end?

Thursday, 14 August 2014

Lazy Recipe: Sardine Pasta Bake

One might ask, "What's with all these recipes?" Well, you see, this blog is a record of stuff I do, so it's either recipes or my thesis-writing. No one wants to hear me whinge about my thesis-writing.

Anyway, it was an hour from lunch so I raided my kitchen for ingredients and put something together semi-randomly. I do this fairly often, but this particular dish was of a surprisingly legitimate quality.

Sardine Pasta Bake
Loosely adapted from this recipe.

Ingredients
100 g fusilli pasta
1 can Ayam Brand Sardines in Extra Virgin Olive Oil and Green Peppercorns
1/2 cup plain Greek-style yoghurt
1 tbs tomato sauce
1/2 tbs dried thyme or oregano
Pinch salt
1-2 tbs shredded mozzarella cheese
1-2 tsp panko bread crumbs
Dash cayenne pepper
1/2 tbs butter

Preheat oven to 220°C. Alternatively, use a toaster oven (no preheating required).

Cook fusilli pasta in boiling, salted water until it just turns al dente. Drain and set aside.

Empty sardine can into a small bowl (do not drain). Use 1 tbs of the olive oil to grease the bottom and sides of a 750 ml capacity oven-proof dish. Split the sardines lengthwise in half and remove the vertebral bones. Arrange the fish evenly on the base of the oven-proof dish. Scatter the peppercorns over the fish. Place the drained pasta on top.

Mix yoghurt and tomato sauce until combined. Stir in the thyme and salt. Pour the sauce evenly over the pasta. Spread another 1 tbs of the olive oil from the can on top.

Sprinkle shredded mozzarella to cover the surface of the sauce evenly. Top with panko bread crumbs and cayenne pepper. Place butter in a chilled metal spoon. Working quickly, use your fingers to press the butter into flakes. Scatter the butter flakes evenly on top of the dish.

Bake in the preheated oven or toaster oven for 5-10 minutes, until the top is golden brown. Serve immediately.


Monday, 11 August 2014

Recipe: Italian Bread

The other day, my mother wanted some Italian-style bread for making garlic bread. The problem was, the bakeries near us either didn't carry the right kind of bread, or had it pre-sliced crosswise (the recipe required the bread to be cut lengthwise). And therefore...

Italian Bread (makes 1 loaf)
Adapted from this recipe at The Fresh Loaf

Ingredients
Starter
1/4 cup skim milk, scalded
1/4 cup water
1/2 cup bread flour
1/3 tsp active dry yeast, or 1/4 tsp instant yeast

Dough
Pre-prepared starter
2 1/2 cups (scooped) bread flour, plus extra
1/2 cup skim milk, scalded
1/3 cup water
1/2 tbs brown sugar
1/2 tbs salt
1 1/2 tsp active dry yeast, or 1 tsp instant yeast
1/2 tbs olive oil

To prepare the starter, scald the milk in a medium-sized microwave-safe bowl and allow it to cool to body temperature (about 37°C - test by dropping a little onto the back of your hand). Stir in yeast and allow to reactivate for 5 minutes. Mix in water and bread flour. Cover with cling wrap and incubate in at room temperature (25-28°C) for 4-16 hours.

Prepare the dough. Scald milk and allow to cool, as before. Dissolve the brown sugar in the milk. Stir in yeast and leave for 5 minutes to reactivate. In a large bowl, combine the yeast mixture, all the starter, water, olive oil, salt and 1 cup of the flour. Mix thoroughly using a wooden spoon or your hands.

Knead in more flour 1/2 cup at a time, until the dough is only slightly sticky, and comes off the bowl when lifted up. Grease a bowl well with olive oil; shape the dough into a ball and place it in the greased bowl. Lightly grease a piece of cling-wrap with olive oil and place it, greased side down, over the dough and the bowl. Allow the dough to rise at room temperature until doubled in size (1-2 hours). Punch down the dough and knead for 1 minute. Allow to rise at room temperature for another 30-60 minutes.

Punch down the dough again and shape into a ball. Return the dough to the greased bowl, cover with greased cling-wrap and allow to relax for 10-20 minutes.

Shape dough into a boule or bâtard shape. Cover loosely with greased cling-wrap and allow to rise until doubled in size (30-60 minutes). Do not over-rise.

Place baking stone in oven, and preheat to 240°C. Right before placing the bread in the oven, brush or spray  the dough lightly with water. Use a sharp knife or razor to slash the bread. Lightly sprinkle some flour onto the baking stone before placing the bread on top.

Bake bread at 240°C for 1 minute. Without opening the oven door, reduce the temperature to 220°C and bake for another 20 minutes. Rotate the loaf around and bake for a further 20-30 minutes, until the loaf is evenly browned and the bottom sounds hollow when tapped. Remove and cool on a wire rack for at least 30 minutes before serving.


Notes

To scald milk, place milk in a microwave-safe bowl or mug. Place a wooden chopstick such that it breaks the surface of the milk; this is to prevent the milk from over-boiling. Microwave on high for 2-3 minutes until the milk starts to boil. Stop the microwave immediately and allow the milk to cool.

For instructions on shaping loaves, this is a great site with pictures, and this video demonstrates how to shape and slash a bâtard.

If you haven't got a baking stone, use an upside-down cast-iron skillet or heavy baking pan.

I actually use a microwave oven with a convection setting for baking bread. Since it has a rotating turntable and uses hot air to maintain the internal temperature, the bread comes out evenly browned and perfectly baked.

Sunday, 10 August 2014

Recipe: Gâteau au Yaourt (French Yoghurt Cake)

This cake is simple to make, so ridiculously simple. With only one and a half hours of preparation and baking time, it's almost faster to make this cake at home than to go out to the bakery. It's also very light, with an airy texture akin to a chiffon cake.

Gâteau au Yaourt
Adapted from this recipe and various other sources

Ingredients

1 cup Greek-style yoghurt
2 large eggs
160 g caster sugar
80 ml canola or other flavourless vegetable oil
3/4 tbs dark brown sugar
1 tbs pineapple juice, at room temperature
1 tsp vanilla essence
1/8 tsp almond or rum essence
250 g plain flour
1 1/2 tsp baking powder
1/2 tsp baking soda
1/16 tsp salt

Preheat oven to 180°C. If using a metal cake pan, line it with parchment paper; for a silicone cake pan, dust the pan lightly with flour.

In a large mixing bowl, gradually mix the caster sugar into the yoghurt until homogeneous. Gently stir in the eggs and oil.

In a small bowl, dissolve the dark brown sugar in pineapple juice. Stir in vanilla and almond essences. Incorporate into the yoghurt mixture.

Separately, sift together the flour, baking powder, baking soda and salt. Sprinkle the flour mixture over the wet mixture; fold gently until just combined. Do not over-mix.

Carefully pour the batter into the cake pan. Bake for 30-35 minutes until golden brown. Allow the cake to rest at room temperature for 10 minutes, then transfer to a wire rack to cool completely.

Tuesday, 23 July 2013

Recipe: Cherry Pie

I return after a long time, bearing pie! No photographs, yet again - I literally just finished consuming the last of it, and it didn't occur to me even once that I should gather some pictorial evidence of its existence. No matter, it will be appear again! Sometime.

I brought this pie to work for Pi Day, and it was declared the best of all the baked goods I have prepared so far. In the face of such high praise, who am I to withhold the recipe?

Cherry Pie
Adapted from Cooks Illustrated and various other sources

Ingredients
Crust
2 1/2 cups gluten-free flour blend
1/2 tsp salt
3 tbs raw sugar
225 g unsalted butter, cubed
2 eggs
Ice water

Filling
6 cups halved and pitted cherries (requires about 1 kg fresh cherries)
2 red plums, halved and pitted
1/2 cup raw sugar
Pinch salt
1 tbs freshly-squeezed lemon juice
2 tbs ground instant tapioca
Pinch ground cinnamon
2 tbs (25 g) unsalted butter, cut into 1 cm squares
1 large egg, beaten with 1 tsp water

To make the pie dough, mix flour, salt and sugar with a fork. Add butter; rub into the flour mixture until it resembles breadcrumbs. Stir in eggs. Gradually add a little cold water until the dough comes together; it will be quite crumbly and slightly sticky. Split dough in half; flatten each half into a 10 cm disc. Wrap each disc in cling film and refrigerate for 45 minutes to up to 2 days.

Process plums and 1 cup of the cherries in a blender until smooth, about 1 minute. Strain the purée through a fine mesh strainer into a large bowl, pressing down on with a spoon to extract as much liquid as possible. Discard any leftover solid material. Add remaining 5 cups of cherries, sugar, salt, lemon juice, tapioca and cinnamon. Mix well to combine. Allow to stand for 15 minutes.

Place a baking tray on the lowest rack of the oven; preheat to 205 degrees C. Dust 2 sheets of baking paper with corn starch. Remove one round of dough from the refrigerator and allow to warm slightly; roll out evenly between the sheets of baking paper to about 1/3 cm in thickness. Remove the baking paper and loosely wrap the dough around the rolling pin to lift it. Line a 23 cm pie or tart pan with the dough, leaving a 1-2 cm overhang. 

Fill pie pan with cherry filling. Scatter butter pieces evenly over the filling. Roll out second round of pie dough between 2 well-dusted sheets of baking paper, as before, and place on top of filling. Pinch the pastry edges together into a fluted pattern; trim the excess with a sharp knife or kitchen scissors. 

Brush the top of the pastry evenly with the egg wash. Using a sharp knife, cut 8 evenly-spaced slits in the top crust. Place pie in the freezer for 20 minutes.

Transfer pie onto the preheated baking tray in the oven. Bake at 205 degrees C for 30 minutes, then reduce the oven temperature to 180 degrees C and bake for a further 30-40 minutes, until the crust is golden-brown and the juices are bubbling up. Remove from oven and transfer to a wire rack. Cool to room temperature, about 2-3 hours, until the filling is set. 


Notes

Frozen cherries (about 900 g) can be used instead. If fresh plums are unavailable, use 3-4 canned whole plums.

Gluten-free pastry crumbles easily and is difficult to work with. Plain flour can be used instead, but the crust will not be as flaky. There is a well-recommended pie dough which uses vodka, but I haven't tried it before.

Sunday, 12 May 2013

Recipe: Raisin Brioche

I bake almost every week now, but they have mostly been dishes which I don't need to type up a post for, since I used the recipes without modification. Well, other than substituting raw sugar and Dutch cocoa at every opportunity.

(FYI, that chocolate tart is delicious, and the spiced oranges are wonderful sans tarte or even, if I may continue to indulge in gratuitous French, when served à la mode.)

(Edit from the future: The chocolate tart link is now gone, wayback machine link here.)

But when a colleague at the lab requested raisin brioche, I had to perform some actual research. The recipe below is the result of careful Internet-based research (step 1: avoid any websites affiliated with cooking shows) and educated guesses. The delicious result, judging by the speed at which it was consumed. This recipe also contains some tweaks to my older brioche recipe.

Raisin Brioche

Ingredients

Dough
1 sachet (7g) active dried yeast
1/4 cup warm milk
1/5 cup caster sugar
2 4/5 cups bread flour
1/4 tsp salt
3 eggs, lightly beaten
125 g butter, softened to room temperature

Raisin filling
1 cup raisins or sultanas
1 cup hot water
2 tbs. rum essence
1/4 cup raw or brown sugar
1/2 tsp. cinnamon
1-2 tbs. melted butter

Topping
1 egg
1 tbs. water
1-2 tbs. raw or brown sugar

Place the raisins in a bowl. Cover with hot water and gently stir in rum essence. Cover bowl and set aside. If soaking the raisins overnight, place in the refrigerator.

Combine yeast, milk and 1 tbs. of the caster sugar in a small bowl. Allow to sit for 5 minutes until frothy.

In a large bowl, combine flour, salt and the remaining caster sugar. Make a well in the centre and stir in the yeast mixture. Gradually add the beaten eggs and stir until just combined. Turn out the dough onto a lightly floured surface; if the dough is too dry, add water a tablespoon at a time. Knead for 5 minutes until smooth.

Add a little of the butter and work into the dough. Continue slowly working in the butter. The dough will soften and gain a yellowish tinge. Place the dough in a bowl and cover with a lightly-floured sheet of cling wrap and allow to rise at 30-40 degrees C for 1 hour, until doubled in size. Punch down the dough and knead for about 5 minutes until smooth. Return dough to the bowl, cover with lightly-floured cling wrap and allow to rise again, either at 30-40 degrees C for 1 hour, or in the refrigerator overnight.

Grease a standard loaf pan (for a non-stick pan, skip this step). Punch down the dough and knead for 5-10 minutes until pliable. Place on a lightly-floured surface and roll out into a 18'' x 11'' rectangle. Brush the dough with melted butter. Mix cinnamon and sugar; sprinkle on top as evenly as possible. Drain the raisins and scatter them over the dough, making sure that they are spread evenly up to the edges.

Fold over one of the longer edges of the dough. Roll up the dough as tightly as possible. Gently bend the roll into a U shape. Twist the roll into a braid. Place the shaped loaf into the pan and allow to rise for 1-2 hours, until the top of the loaf is 1-2'' above the edge. 

Preheat oven to 200 degrees C. Lightly beat eggs and water to make an egg wash. Brush the top of the loaf with the egg wash and sprinkle with sugar. Place in the oven and immediately reduce the temperature to 190 degrees C. Bake for 10 minutes and then, without opening the oven door, lower the temperature to 160 degrees C. Bake for 20-35 minutes until the bread is a deep golden brown. It will also sound hollow when tapped on the bottom.

Turn out the loaf onto a wire rack. Rest on its side for 5 minutes, then turn it onto the other side and allow it to cool completely.


Notes

I use 2 tsp. instant yeast instead of active dried. I still add it to the warm milk first, just to check that it's still alive. I may be slightly paranoid.

The older brioche recipe suggested cutting up the butter into cubes, but I found it easier to let the butter soften and then grab a bit of it by hand to work it into the dough. Of course, if you live in a warm country, the cubes are probably going to melt in a matter of seconds anyway.

For flouring surfaces, corn starch works really well.

I like to use my oven as a makeshift incubator to get the dough to rise in a reasonable duration. I'm a microbiologist, you see.

My black silicone loaf pan allows the bread to expand sideways, resulting in a slightly ballooned loaf, but the dark colour ensures that the side and bottom of the loaf are nicely browned. The lesson here is that the ideal loaf pan is both rigid and dark in colour.

Why are half my measurements in metric and the other half in imperial? Well, you see, I know how to measure 8'' and 6'' spans using my hands.
  • 8'' - distance from the tip of my thumb to the tip of my little finger, if I stretch them apart as for as possible.
  • 6" - distance from the tip of my thumb to the tip of my little finger, if I fold in the other three fingers in a "phone call" gesture.
Also, inches are easy to estimate by eye, and uh... No, it's actually my father who taught me to estimate in inches, from a time when the imperial system was slightly more popular. It just stuck, I suppose.

The bread is rather flimsy and soft, so I recommend either toasting it or refrigerating it overnight to stiffen it up a little. Or simply stuffing it into your mouth like that much cotton candy, whatever works.